Saturday, September 22, 2012

Mainsheet for AF3 - third try is a charm

New nylon webbing reef nettles.


I've always resisted getting "yacht" grade hardware for my little plywood boat, but I've learned that sometimes the expensive stuff makes your boat far more seaworthy than the cheap stuff.

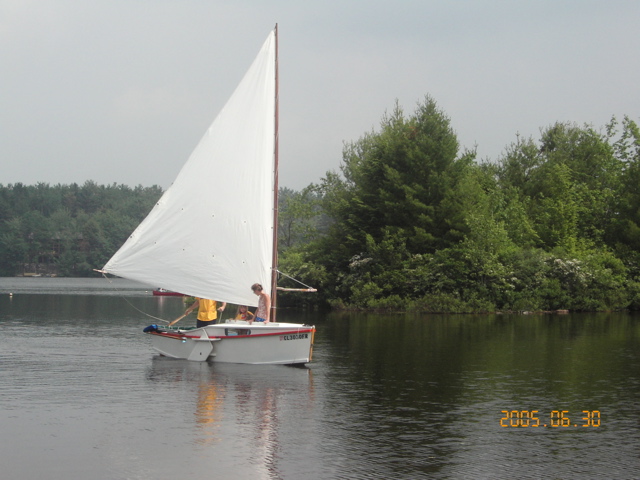
For twelve years, I sailed Cream Cheese with the simple mainsheet arrangement shown on the plans.

original
Then in March, I modified the rig to bring the sheet forward.

modified
We sailed last weekend in gusty conditions (5 to 15 mph) and I was still unsatisfied with the mainsheet.  It suffered from a number of problems:
1. The line was too thin - 1/4" line is not comfortable to hold when it is really windy
2. Mainsheet was tied to a combination block/jam cleat forward.  This holds the mainsheet too firmly.  It was too difficult to release during gusts.
3. The mainsheet gets in the way when you are coming about.
4. Running the mainsheet through a block on the base of tiller creates an awkward weather helm.

So I looked at the mizzen for the Core Sound 20, which has about the same sail area and the same position in the stern.

Core Sound 20 mizzen sheet

It has three important features:
1. 3/8" line.  Easier to handle in strong winds, lays better in the cockpit.
2. Standup blocks on either side of the tiller - no extra forces on the tiller.
3. Cam cleats - super easy to set or release.  Much safer in gusts.

So I went to defender.com and bought some expensive hardware and 50' of low stretch line.
I tried out the new mainsheet arrangement today with more gusty winds.  Wow- what a difference.  Even Julie, who is doesn't usually like sailing in gusts, was very comfortable at the helm.

New main sheet - I'll fix that twist later.


Saturday, September 15, 2012

How to Install a Sailrite Jiffy Grommet

New jiffy grommet, old sail

Before installing the jiffy grommets on my clew and tack reef patches I looked for online tutorials or technical notes but didn't find much, so I'm posting my experience here.

When I got my jiffy grommet kit, there were no instructions other than what is printed on sairite's website "... Special tools are not required - simply use a hammer to mushroom the ends of the soft aluminum rivets in place ..."  After some experimentation, here's the process I decided to use.

I had to push the six rivets through seven layers of 4oz dacron.  I experimented on a test patch with a 1/8" drill, but I found that a 1/8" hole punch was far superior.

1/8" hole punch
After punching the holes, I assembled the grommet.

Rivets 
That jagged circle you see in the luff tape is where an old spur grommet used to be before the reef patch was sewn in place.

Rivets ready to be hammered down
Once I hammered down the rivet, used a soldering iron with a flattened soldering tip to cut the hole through seven layers of fabric.  This was quick and easy and had the added benefit of welding all seven layers together for added strength.

Cutting out the fabric - flattened soldering iron tip on right

Jiffy grommet, sail, tools

Third Reef Pictures

Here's a look at the third reef under sail.  I haven't been out in wind strong enough to know whether there will be significant lee helm.


Pretty Day at Marsh Creek Lake
Sharpie spritsail and clouds 

Sunday, September 9, 2012

Sewing a third reef

I decided to make a third reef for Cream Cheese in May.  It has been 12 years since I sewed the sail, and I wasn't looking forward to re-learning all of the special sail sewing techniques. 

Pretty stitches on the new clew reef patch
As it turned out, it was a fun project.  The first step was to pull out my copy of "Sailmaker's Apprentice," by Emiliano Marino, and re-read a few relevant chapters.  Then I ordered the cloth and jiffy grommets from Sailrite.

Next, I spread the sail out on the floor to plan the location and size the various panels that would be sewn together to make the reef patches.

Reef plan
 I did this by taking off the dimensions from the existing patches.

Reef patch dimensions
At this point I was ready to cut the panels.  My reading indicated that scissors aren't the best for cutting dacron sail material because the cut is more likely to fray under heavy use.  A hot knife is the preferred method, but I wasn't going to fork out $400 for an industrial hot knife.  I settled for attaching a rope cutting blade to my soldering iron (with a little modification).  The edges were a little rough, but it was good enough.

Cutting out dacron panels
I had to redo all of the cringle patches because I got the weave orientation wrong (see "Sailmaker's Apprentice").  Each reef cringle patch is 4" square.  There are two patches for each reef patch and the fabric weave should match the weave of the sail at the point of attachment.

I used basting tape to assemble the clew, tack and cringle patches and then put them aside.

Now I was ready to start sewing, but before I could do that, I needed to freshen up on my sewing skills and make sure the needle, thread and machine were going to be able to go through seven layers of dacron.  This probably took more time than any other part of of the project.  My sewing machine is a Janome 7330, which is a "home decor" machine.  It comes with a two kinds of zig-zag stitches, has a pretty good motor and a fairly strong feeder.  I discovered that this machine with a #90 needle will do a zigzag seam on five layers of 4oz dacron, but not on seven layers.  It works fine with a #110 needle but but I was worried that the holes in the fabric were a little too large.  After talking it over with a few people, I decided to go with the #110 needle and larger holes.  I've been happy with the results.

Janome 7330, basted reef patches, practice patch.
Now I was ready to sew!  This part of the operation went relatively quickly.  First, I cut loose the luff tape (seam along the luff of the sail) and pinned the pre-assembled reef patch to the sail.  Then I rolled up the excess material and started sewing.


First seams going together.
Once the tack and clew patches were sewn on, I pinned and sewed each reef patch.

Reef cringle patch
Now that all patches were on the sail, the last step was to install grommets.  The reef grommets were the easiest.  Simply, cut the hole with a 3/8" hole punch and install the #2 grommet with the two part die set.

Reef cringle patch and tools
Installing the sailrite jiffy grommets on the clew and tack were a bit trickier.  A jiffy grommet is comprised of two washers that are attached to the sail using six aluminum rivets.  The kit came with no instructions and there is very little on the web about the best way to do it, but I'm pleased with the results.  

Third reef  - project complete
Now the third reef is finished - I can hardly wait to try it out in heavy weather.

Sunday, July 8, 2012

Rowing, Rowing, Rowing

My niece just got back from Hurricane Island Outward Bound School.  The school recently introduced a modern 30' Sharpie Schooner pulling boat that is completely different from the one that I used when I attended in the late 70's.

2007 Hurricane Island Outward Bound Sharpie Schooner
The new boat looks like a lot of fun.  Notice those very deep reefs in the main sail and foresail.  Fast, shallow, seaworthy.

Old Spritsail Pinky
The old boats were carvel planked wooden spritsail cat ketches, "Pinky" style.  They were slow, heavy and didn't point well.  One thing both boats have in common is lots of oars and one thing that both our trips featured was lots of rowing (separated by 35 years).  When she got back last week, my niece arranged a fourth of july sailing afternoon with friends and siblings aboard my father's Drascombe.  Before long the whole crew was rowing.

The Drascombe rowing into a headwind
Julie and I have been talking about rowing lately because we are training for an upcoming Watertribe event which could involve many hours of rowing, depending on the wind conditions. To help with our training, we bought a used Concept 2 rowing machine.

Rowing machine with sail
(sail laid out in preparation for sewing the third reef)
We like the full body workout that the rowing machine gives us and even if we don't do the race it was a good purchase.  This morning we went out for a short row to see how our training has helped.  

Julie powered
It went OK, but the oars were a little hard to control.  Both of the oar leathers had slipped and the oars were bumping against the top of the oar ports.  To make things easier, I've added "buttons" to the oar leathers using a turk's head knot.  

Turks head knot for oar buttons
Before today, I didn't know how to tie this knot so I tried following the instructions in my copy of "The Young Sea Officer's Sheet Anchor", (pub 1819), but in the end I figured it out by watching this video on YouTube.  I am amazed at how tight this knot can get.  The leathers were slipping the length of the oar loom, but now they stay put.  

Sunday, May 27, 2012

A third reef for Cream Cheese? Wind Forces, Sail Math

I made the 96 sq ft mainsail for my AF3  from a Sailrite kit.  I gave them the dimensions and draft and asked them to put in two reefs even though only one is specified on the plans.  The second reef reduces the sail to about 49 sq ft.   Even with two reefs she is overpowered at anything above 25 mph.

Double reefed, 15 - 25 mph

No reefs, drifting along
An AF3 weighs 250 to 350 lb and has a 4' beam which is a bit narrower than other boats her size so her sail area has more of an impact on stability.  I am considering sewing a third row of reef points to get the sail down to 31 sq ft so that I can sail upwind more comfortably when the wind kicks up.

I don't want to spend a whole weekend sewing just to find out the boat won't point so I've done some searching on the web, some asking around (the watertribe forum was very helpful) and some calculating.

Will a third reef result in too little sail?
Adding a third reef will reduce sail from 96 sq ft to 31.5 sq ft.  Is that enough sail to make headway in 30 mph winds?  The force exerted by a sail is proportional to the square of the wind velocity.  Jim Michalak has given a simple formula:

 Max sail pressure (lbs/sq ft) = .0034 * V(kts)2 * C

where V is in Knots and C is a constant representing sail efficiency from 1 to 2.  My mainsail has good draft and a nice shape, so I'm calling it a C=1.5.  Since I like to measure speeds in miles per hour, I applied an additional conversion and came up with the following table for my mainsail:

Force on sail (lbs) for different sail areas (sqf)
and wind conditions (mph).
Unreefed going upwind, AF3 likes a 10 to12 mph breeze the best.  This turns out to be about 42 to 62 lbs force exerted by the sail.  She sails upwind fine with two reefs in 20 mph = 87 lbs.  She is overpowered at 25 mph = 136 lbs.  A third reef at 31.5 sqft should generate 126 lbs at 30 mph.  Still managable and certainly not too little force.  So a third reef to 31.5 sq ft seems to be plenty enough to make headway.

Another possible issue is related to force of the wind on the hull.  As you reef down the sail, the force of the wind on the hull has a greater effect on the total force.

Wind force on exposed hull (frontal area) as wind increases. 
I admit that this computation is pretty loose: it assumes the hull acts like a very poor sail (C = .5) and the area exposed to the wind is about 3' x 8' (because the boat is presenting about 50% of itself to the wind).  The table predicts that at 30 mph, the wind exerts 32 lbs force on the hull.  At that same wind velocity, the triple reefed sail will exert 126 lbs force, so the math is still looking OK.

Will there be too much lee helm?
I am also concerned about lee helm, an unsafe situation in high winds. Without any reefs, the centroid of the sail is even with the trailing edge of the leeboard.  With two reefs in, the centroid is 13" farther forward (see picture below).  I would have expected to experience lee helm with the second reef in, but instead I get significant weather helm, especially during gusts above 25 mph.  I have no idea why this happens, but I can think of a couple of possibilities:
  1. If you heel her over to port she wants to round up to starboard - just like steering a surf board.  Perhaps the turning forces due to the hull are a lot more powerful than the turning forces due to the sail center of effort..  
  2. As you heel the boat, the center of effort moves to lee because the mast is angled over the water and the center of resistance (leeboard) moves to windward.  Perhaps the geometry of this situation lessens the imbalances in force (there is still a tendancy toward lee helm, but the force vectors are smaller).
  3. An imbalanced rudder can make the problem more pronounced if the center of resistance of the rudder blade is too far behind the rudder pivot (thanks to SOS for that suggestion)
A third reef will move the centroid forward 19" (as opposed to 13" with two reefs).  So my tentative conclusion is - I'm hoping I'll get lucky and it won't cause lee helm.


Jim Michalak's articles on sail math:

Saturday, May 12, 2012

Shallow Water Sailors Spring Cruise 2012

A rare photo of Cream Cheese under sail taken by Norm.
CLC Pocket Ship in the background.

Last Saturday, Julie and I met up with the Shallow Water Sailors in the Chester River on the eastern shore of the Chesapeake Bay.  They were in the middle of their spring cruise which started on Thursday and ended on Sunday.  It was great to meet other small boat enthusiasts and sail with boats that I had read about for years but never seen.  There were three Dovkies, two Shearwaters, a CLC Pocket Ship, a Normsboat, a Core Sound 20, a Montgomery 17 and a few other types.

We launched at Long Cove, a Kent County boat ramp and marina with a lot of working craft. 

Wooden workboats getting ready for the season

Ready to sail
As we sailed out of the cove, we met up with the flotilla heading south - almost like we had planned it that way.  We spent a leisurely hour of sailing in company and watching a Lightning class dinghy race.

Normsboat and a Dovkie

Norm and his Normsboat

Upwind leg.  Notice how she is down at the stern.
Next time, I will move some more weight to the bow to
counterbalance that motor.

We headed across the Chester river to a small beach to stop for lunch.  The upwind sail in about 10 mph winds gave me an opportunity to see how each boat performed.


I was impressed with the speed of the Normsboat, Dovkie, Core Sound 20 and the Pocket Ship.  In particular, I was surprised by the performance of the Pocket Ship because it just seems so cute and shippy.  I had assumed her looks came at the expense of performance, but I was proved wrong: she points well and goes fast.

Brent and his Core Sound 20
At the beach we got a chance to meet some of the crew and talk about boats and cruising for a while.

Core Sound 20 and wet dog

Dovkie on the beach  (the bunk lids are added)

A well built Marth Jane, it felt much larger than I had expected 

A beautiful CLC Pocket Ship

Leo and Paul talking boats
On the way back, the clouds rolled in and wind picked up to about 15 to 20 mph and we screamed back to the ramp on a broad reach, sometimes breaking 7 mph, which is very fast for Cream Cheese.  The new changes to the reefing system worked out well and we were able to tie in a reef with much less hassle than before.  The new oar port covers kept the cockpit dry the whole time, something I don't remember happening in a long time.

It was a great day and I look forward to more adventures with new friends.