Sunday, July 8, 2012

Rowing, Rowing, Rowing

My niece just got back from Hurricane Island Outward Bound School.  The school recently introduced a modern 30' Sharpie Schooner pulling boat that is completely different from the one that I used when I attended in the late 70's.

2007 Hurricane Island Outward Bound Sharpie Schooner
The new boat looks like a lot of fun.  Notice those very deep reefs in the main sail and foresail.  Fast, shallow, seaworthy.

Old Spritsail Pinky
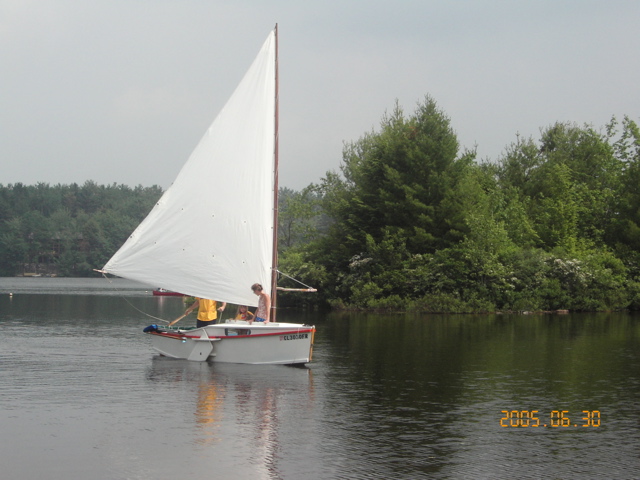
The old boats were carvel planked wooden spritsail cat ketches, "Pinky" style.  They were slow, heavy and didn't point well.  One thing both boats have in common is lots of oars and one thing that both our trips featured was lots of rowing (separated by 35 years).  When she got back last week, my niece arranged a fourth of july sailing afternoon with friends and siblings aboard my father's Drascombe.  Before long the whole crew was rowing.

The Drascombe rowing into a headwind
Julie and I have been talking about rowing lately because we are training for an upcoming Watertribe event which could involve many hours of rowing, depending on the wind conditions. To help with our training, we bought a used Concept 2 rowing machine.

Rowing machine with sail
(sail laid out in preparation for sewing the third reef)
We like the full body workout that the rowing machine gives us and even if we don't do the race it was a good purchase.  This morning we went out for a short row to see how our training has helped.  

Julie powered
It went OK, but the oars were a little hard to control.  Both of the oar leathers had slipped and the oars were bumping against the top of the oar ports.  To make things easier, I've added "buttons" to the oar leathers using a turk's head knot.  

Turks head knot for oar buttons
Before today, I didn't know how to tie this knot so I tried following the instructions in my copy of "The Young Sea Officer's Sheet Anchor", (pub 1819), but in the end I figured it out by watching this video on YouTube.  I am amazed at how tight this knot can get.  The leathers were slipping the length of the oar loom, but now they stay put.  

Sunday, May 27, 2012

A third reef for Cream Cheese? Wind Forces, Sail Math

I made the 96 sq ft mainsail for my AF3  from a Sailrite kit.  I gave them the dimensions and draft and asked them to put in two reefs even though only one is specified on the plans.  The second reef reduces the sail to about 49 sq ft.   Even with two reefs she is overpowered at anything above 25 mph.

Double reefed, 15 - 25 mph

No reefs, drifting along
An AF3 weighs 250 to 350 lb and has a 4' beam which is a bit narrower than other boats her size so her sail area has more of an impact on stability.  I am considering sewing a third row of reef points to get the sail down to 31 sq ft so that I can sail upwind more comfortably when the wind kicks up.

I don't want to spend a whole weekend sewing just to find out the boat won't point so I've done some searching on the web, some asking around (the watertribe forum was very helpful) and some calculating.

Will a third reef result in too little sail?
Adding a third reef will reduce sail from 96 sq ft to 31.5 sq ft.  Is that enough sail to make headway in 30 mph winds?  The force exerted by a sail is proportional to the square of the wind velocity.  Jim Michalak has given a simple formula:

 Max sail pressure (lbs/sq ft) = .0034 * V(kts)2 * C

where V is in Knots and C is a constant representing sail efficiency from 1 to 2.  My mainsail has good draft and a nice shape, so I'm calling it a C=1.5.  Since I like to measure speeds in miles per hour, I applied an additional conversion and came up with the following table for my mainsail:

Force on sail (lbs) for different sail areas (sqf)
and wind conditions (mph).
Unreefed going upwind, AF3 likes a 10 to12 mph breeze the best.  This turns out to be about 42 to 62 lbs force exerted by the sail.  She sails upwind fine with two reefs in 20 mph = 87 lbs.  She is overpowered at 25 mph = 136 lbs.  A third reef at 31.5 sqft should generate 126 lbs at 30 mph.  Still managable and certainly not too little force.  So a third reef to 31.5 sq ft seems to be plenty enough to make headway.

Another possible issue is related to force of the wind on the hull.  As you reef down the sail, the force of the wind on the hull has a greater effect on the total force.

Wind force on exposed hull (frontal area) as wind increases. 
I admit that this computation is pretty loose: it assumes the hull acts like a very poor sail (C = .5) and the area exposed to the wind is about 3' x 8' (because the boat is presenting about 50% of itself to the wind).  The table predicts that at 30 mph, the wind exerts 32 lbs force on the hull.  At that same wind velocity, the triple reefed sail will exert 126 lbs force, so the math is still looking OK.

Will there be too much lee helm?
I am also concerned about lee helm, an unsafe situation in high winds. Without any reefs, the centroid of the sail is even with the trailing edge of the leeboard.  With two reefs in, the centroid is 13" farther forward (see picture below).  I would have expected to experience lee helm with the second reef in, but instead I get significant weather helm, especially during gusts above 25 mph.  I have no idea why this happens, but I can think of a couple of possibilities:
  1. If you heel her over to port she wants to round up to starboard - just like steering a surf board.  Perhaps the turning forces due to the hull are a lot more powerful than the turning forces due to the sail center of effort..  
  2. As you heel the boat, the center of effort moves to lee because the mast is angled over the water and the center of resistance (leeboard) moves to windward.  Perhaps the geometry of this situation lessens the imbalances in force (there is still a tendancy toward lee helm, but the force vectors are smaller).
  3. An imbalanced rudder can make the problem more pronounced if the center of resistance of the rudder blade is too far behind the rudder pivot (thanks to SOS for that suggestion)
A third reef will move the centroid forward 19" (as opposed to 13" with two reefs).  So my tentative conclusion is - I'm hoping I'll get lucky and it won't cause lee helm.


Jim Michalak's articles on sail math:

Saturday, May 12, 2012

Shallow Water Sailors Spring Cruise 2012

A rare photo of Cream Cheese under sail taken by Norm.
CLC Pocket Ship in the background.

Last Saturday, Julie and I met up with the Shallow Water Sailors in the Chester River on the eastern shore of the Chesapeake Bay.  They were in the middle of their spring cruise which started on Thursday and ended on Sunday.  It was great to meet other small boat enthusiasts and sail with boats that I had read about for years but never seen.  There were three Dovkies, two Shearwaters, a CLC Pocket Ship, a Normsboat, a Core Sound 20, a Montgomery 17 and a few other types.

We launched at Long Cove, a Kent County boat ramp and marina with a lot of working craft. 

Wooden workboats getting ready for the season

Ready to sail
As we sailed out of the cove, we met up with the flotilla heading south - almost like we had planned it that way.  We spent a leisurely hour of sailing in company and watching a Lightning class dinghy race.

Normsboat and a Dovkie

Norm and his Normsboat

Upwind leg.  Notice how she is down at the stern.
Next time, I will move some more weight to the bow to
counterbalance that motor.

We headed across the Chester river to a small beach to stop for lunch.  The upwind sail in about 10 mph winds gave me an opportunity to see how each boat performed.


I was impressed with the speed of the Normsboat, Dovkie, Core Sound 20 and the Pocket Ship.  In particular, I was surprised by the performance of the Pocket Ship because it just seems so cute and shippy.  I had assumed her looks came at the expense of performance, but I was proved wrong: she points well and goes fast.

Brent and his Core Sound 20
At the beach we got a chance to meet some of the crew and talk about boats and cruising for a while.

Core Sound 20 and wet dog

Dovkie on the beach  (the bunk lids are added)

A well built Marth Jane, it felt much larger than I had expected 

A beautiful CLC Pocket Ship

Leo and Paul talking boats
On the way back, the clouds rolled in and wind picked up to about 15 to 20 mph and we screamed back to the ramp on a broad reach, sometimes breaking 7 mph, which is very fast for Cream Cheese.  The new changes to the reefing system worked out well and we were able to tie in a reef with much less hassle than before.  The new oar port covers kept the cockpit dry the whole time, something I don't remember happening in a long time.

It was a great day and I look forward to more adventures with new friends.


Sunday, April 29, 2012

More upgrades

1. Reefing
In an attempt to make reefing go faster, I've made a few minor changes.

Snotter.  Up till now, I've simply tied the snotter around the mast.  There is a spring clip tied to the end of the boom which clips to the snotter.  This is a simple system, but it gets fouled with the sail lacing when raising and lowering the sail to reef.  The new arrangement uses a ring tied to the mast.  The spring clip is now clipped to the ring and tied to the snotter.
New snotter setup
Downhaul. I also got a larger hook for for my downhaul which is easier and faster to fasten.

Larger spring clip
I did a few reefing drill with the new rig in my driveway: the best I could do was about six minutes.  On the water, it will probably take closer to ten minutes.  The results are a bit disappointing, but I think the procedure will be safer and more reliable with the latest changes.

2. Oar Ports
Last trip we got a lot of water in the cockpit through the oar ports when it was blowing and choppy.  I made two covers for the oar ports to keep the waves out.


Sunday, April 22, 2012

Panel Cart

I have a lot of lumber and sheet stock left over from old projects.  I usually find a use for it, but sometimes it takes five or ten years.  For a long time, I just stacked it against a wall in the garage, but it was difficult to find things, impossible gain access to keep the garage clean and mice and other animals would die back there.  Last year, I made a cart from particle board, 2x4's, galvanized pipe and 3" cast iron swivel casters.  It holds a ton of wood and is easy to move around the garage.


A few of the things in my cart:
  • 4/4" pecky cypress planks from an old barn in Louisianna
  • 1/4" UHMW polyethelyne sheet - slippery, dense, machineable.  Great for rub rails and bearing surfaces
  • 1/2" MDO plywood (paper glued on one side)
  • 3/4" ash and cherry
  • 1/4" plexiglass

Boat building glue - 12 year test

When I built Cream Cheese in 2000, I experimented with four different glues.  I figured that about 10 years into the future I would have some useful information to share.  Now that over a decade has elapsed, I feel I can report on the success rate.  I've had the boat in a garage for about half of the time and under polytarps for the other half.  Best to worst:
  1. Epoxy thickened with fused silica. I use thickened epoxy from Raka for the mast, leeboard, rudder, butt-blocks on the hull and some of the deck cleats.  Most of the epoxy joints have held up.  The leeboard, which probably gets the most abuse of all the parts on the boat, has had some delamination.
  2. PL Premium. I glued the port chine log and both gunnle's with PL Premium and it hasn't required any repairs yet, but I suspect it may need some minor work in the near future.
  3. Elmers liquid polyurethane.   I used this liquid glue for gluing the 3/4" pine frames to the bulkheads.  Some of these joints have required repairs.
  4. PL 500.  I used this for the starboard chine log and I've had to repair practically the whole length.  Luckily I didn't use it for anything else
This year I am fixing some of the few remaining spots that haven't been repaired on the starboard chine. To make the repair, I use a chisel and razor to cut out the old glue and create a channel.  Then sand the surrounding area.  Finally, I wet out the joint with epoxy and then apply a fillet. 
You can see there is a gap between the
chine log and the hull.  Fore and aft are fillets
from where I've fixed other parts of the joint. 

For this type of job, I have a number of sanding tools in my box: A Bosch mini belt sander (6"x1.5"), a Dremel combination cutter/sander, a Bosch 2.3 Amp random orbital sander and a Resp-O-Rator.
Sanding Tools
Fillet thickened with fused silica and microballoons


Sunday, April 15, 2012

A Sharpie in Core Sound - Part 4


After spending 3 days on the barrier island called South Core Banks, we were ready to head southward.  Unfortunately, the favorable NE wind from the day before had turned into a strong SW with a forecast for 20 mph winds, gusting to 30.  We took one more long walk on the beach, packed up and stowed our stuff, got into our foul weather gear and headed out.  

Day 4 Path, 16 Miles
After bumping a few times in the shallows near the duck blinds, we made it into the channel and started slogging our way upwind.  We had some vague hope of possibly making it to Shackelford Banks with the help of a favorable wind shift, but after four hours of pounding into the steep chop, we turned around and headed back north, intending to anchor in Oyster Creek, just north of Davis.  I was very proud of how well Cream Cheese had done, but we we weren't racing and Oyster Creek seemed like a nice place to investigate.

On our way, we beached the boat at the Davis Ferry terminal and took a walk around, stopping at a little tourist shop to wash up and have some coffee.  

Beached and sheltered
(the halyard was loose because we
were in the process of lowering the sail)

Back to the small beach near the ferry terminal we lowered the mast and lashed it on deck.  The entrance to Oyster Creek is spanned by a 10' clearance highway bridge, so we knew we would have to lower the mast sometime.  We powered out into the channel, made our way to the mouth of the creek (sometimes surfing with the breaking waves) and scooted under the bridge.  The water in Oyster Creek is 1 to 2 ft but we were near high tide so we followed crab pots deep into the creek and nosed into the bank of a levee.  On the windward side of the levee, the wind was howling and on the leeward side the waves were frothing up just yards from our stern, but it was snug and calm in the wind shadow of the levee.

Snug and dry


Picture taken from the levee road.

The shores of the Core Sound are carved up by hundreds of uniform, straight canals.  In Louisiana, we call canals like these trenasse and they are usually cut by duck hunters or oil companies.  There were a number of trenasse near the levee.  The levee encloses an irregular pond of about one square mile that borders the creek.  The canals are cut outside of this area except where they seem to pierce it (below).  I would love to know more about these structures and their purpose.  Perhaps the pond is/was some sort of fish farm?  Maybe the canals are for flood control, but if so, why does their shape pierce the pond?  Are there submerged pipes?  Maybe the pond was built after the canals and the small bunches of grass (dots on the picture) are just left over spoil? No one I asked could tell me.

Our Anchorage, levee road, trenasses
 After setting up our tent, we took a long walk on the levee road, had a quiet meal and settled down for the night.  All week we had been reading aloud to each other the book Persuasion, by Jane Austin and this night we finally finished it.  (Spoiler alert) The heroine marries well, and all difficulties are resolved.  

After being boarded on the first night by Racoon 139, I decided it would be best to move the boat away from the bank a bit, so I used the second anchor to draw is into the canal a bit. 


Evening in Oyster Creek

Breakfast in Oyster Creek
The next morning, we got up early to beat the low tide but almost missed our window.  We just barely got out of there by sliding Cream Cheese along the mud and polling with our oars.  After passing back under the highway bridge, we stopped at a well maintained boat ramp to raise the mast, make tea and have breakfast.

Breakfast at the bridge

Our plan for the day was to return to Harkers Island Fishing Center so that we could drive home to Pennsylvania the next day.  We had a lovely sail in much more variable wind conditions.  We started the day with one reef but added a second reef a few hours later.  Then the wind dropped to almost nothing so we shook out both reefs.  Later the wind picked up to 15 mph and shifted to the south so we went back to two reefs on an upwind beat, still very comfortable.  Each time we reefed, it took 10 to 15  minutes to get going again and we usually lost a lot of headway as we drifted downwind.  Much of the time was spent dealing with the snotter, downhaul and lacing.  I've got plans to change things to make reefs go faster.


At around 4:00pm, we sailed into the marina, retrieved and cleaned the boat and took long hot showers.

Cream Cheese in front of
Room 3, Harkers Island Fishing Center
That evening, we visited with John, a retired relative of the marina owner.  He helps out with the business and lives in his fifth wheel RV which he keeps parked right at the edge of the shore overlooking the sound.  It was a fun time - learning about his life growing up on Harkers Island and his life in the oil business.  If we return to the area, we will try to get in touch with him again.

The next morning on our way home we stopped at B and B Yacht Designs to talk to Grahame Byrnes about his small boat designs.  We had a fun and interesting visit with Grahame.  He gave us a tour of a big power catamaran that he is building (around 40 ft) and we saw his Core Sound 20 and his Everglades Challenge 22, Southern Skimmer.  He demonstrated his precision cut panel kits and showed us the drawings for a new update to the CS 20 with cuddy, self draining cockpit and water ballast.  He later sent me an email indicating that work on hull #1 is already in progress.  I'm seriously thinking about building this boat.

It was an awesome trip.  The boat did well under challenging conditions.  We had lots of adventures yet plenty of time to relax and when we arrived back home we were tired and happy.

go to Part 1