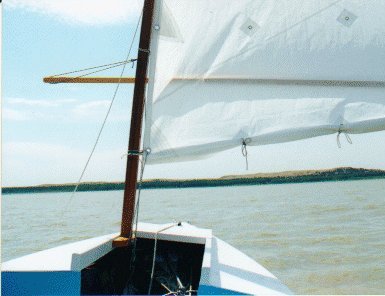
In March, our kids were scheduled to go on a week long service trip. Julie and I haven't been on an extended vacation on our own in a very long time, so we planned to go camping or dinghy cruising somewhere in the south, weather depending. In preparation, I started making long awaited improvements to Cream Cheese. The short list included:
- cabin floorboard for sleeping aboard
- on-deck cargo rails for lashing spars
- cockpit thwarts for more comfort
- tiller hiking stick
- second bower anchor
- motor mount and motor
- camping tent
- new mainsheet arrangement
Floorboards
In past cruises, we have always brought tents and camped ashore but this trip I wanted to try sleeping aboard. Because of the steep rocker of the hull, floorboards are necessary to keep your head above your feet. There is 7' clearance from cockpit bulkhead to the stem, but the main obstacle to sleeping two people in comfort is the mast. When sleeping aboard, we stow the mast on deck (on the spar rails) and move all of the cargo to the cockpit. This leaves a comfy cabin about the size of a backpacker's tent. For floorboard material, I used old 7/8" boards that came from my sister's 90 year old house in Philadelphia. They are probably old growth yellow pine, but they may be fir. The hardest part was stripping off the thick layers of old paint. The floorboards are finished with three or four coats of Watco Teak Oil.
 |
Note the plug over the
mast step. No bumps
when sleeping! |
 Spar Rails
I've always kept the oars lashed to cargo rails in the cabin, but for extending camping, the cabin is full of gear so the oars need to be stowed outside. Norm Wolfe stores his oars on deck on his Michalak Normsboat. I mounted unfinished ash strips with 3/8" holes to the deck using silicon bronze screws and 3M 5200 adhesive sealant.
 |
| Mast, boom and oars on deck |

Thwarts
For 12 years, we've sailed Cream Cheese without any seating per Jim Michalak's plans. For the first few trips I had cockpit benches port and starboard, but they were too high and in the way of practically anything you would want to do so I removed them. We would sit on life jackets and I used a small cooler as a rowing seat. For this trip, we would be spending lots of time in the cockpit and it would be pants and jacket weather and so I added transverse thwarts. The forward thwart is set down low so that it is in the optimal rowing position. The wood is from the same 90 year old cabinets as the floorboards, finished with Watco Teak Oil. I spaced out six 3/8 holes near the thwart edges for lashing cargo and for the new mainsheet combination block/cleat. Both thwarts work great with the bimini too.
Second anchor
My primary anchor is an aluminum fortress Danforth style with six feet of chain and 150' of 3/8" nylon rode. In any kind of wind,
Cream Cheese sails around at anchor like a chihuahua on a leash. I've wanted a second anchor for quite a while so I added a
4.4 lb Lewmar claw anchor with 15' of chain and 200' of 3/8" nylon rode.
 |
| Second bower (left) and best bower (right) |
Cargo carabiners
I've always had cargo rails in the cabin, but lashing things to them involved tedious lacing of lines. Hanging aluminum carabiners made stowing cargo much easier.
 |
| Tiller stowed on port side in dufjel ready for the highway |
Motor and motor mount
Till now I've avoided a motor for Cream Cheese, but for this trip, I opted to pollute my transom with a motor mount. It was only used twice, but both times it was a nice convenience. I still I had to beef up the transom, since the boat is not designed for a motor. Because the AF3 is so light, has so much hull rocker and has such a narrow transom a motor just isn't a good fit. The weight of a motor that far aft can really pull the stern down. For cruising however, we would have lots of cargo in the cuddy to counter balance the motor. Even so, I chose a Suzuki 2.5 because at 30 lbs it is the lightest water cooled four stroke engine that you can get. I decided against a Honda 2 (27 lbs) because it is air cooled which makes it quite noisy. I bought an adapter plate so that I can remove the motor mount when I don't want a motor.
 |
The motor mount slides
into an adapter plate
so that it is easily
removable. |
Tiller extension
I've had a home made tiller extension, and was reluctant to shell out the money required for a manufactured one when I could build my own. I had one on my Drascombe longboat and loved it. This one from Forespar was one of the best $80 I've ever spent. The instant length adjustment and quick release install/removal are key and hard to replicate in wood.
 |
| Tiller extension, old mainsheet arrangement. |
Camping tent
I intended to sew a good camping tent out of the same sunbrella acrylic fabric that I used for my bimini , but I ran out of time and made a "pattern" tent out of heavy duty gray polytarp. In retrospect, this was a good idea because I was able to see the design in many conditions including heavy rain and 20 to 30 mph winds and can now make a real one from that knowledge.
Mainsheet
 |
| Before |
 |
| After |
The plans for AF3 show the mainsheet led aft to the tiller. This had two problems.
- You don't get any mechanical advantage. When you are heading upwind in 20 mph, even with a double reef, your hands will get sore.
- There is no convenient way to have one hand on the tiller and one on the mainsheet. This is crucial in gusty conditions.
The new scheme works great. I laced a single block about 1.5 feet from the end of the boom and run the main sheet from the rudder post through that block down to a racelite block/cleat combination (from the great folks at
Duckworks) that is laced to the forward thwart.
This gives me a 2:1 mechanical advantage and makes it easy to sail with one hand on the tiller and the other on the sheet.
In a separate post, I'll describe how all of these changes worked out during our trip to the Core Sound of North Carolina's outer banks.


